 |
The section is a help page for product settings - for the main website please click here:
- Product Details - this allows you to view, create or edit products with the Product Profile Form and Product Item Form.
- Product Organiser - this allows you to edit product groups and change products within groups using the Product Type Form.
- Price Look-up Table (for EPOS integration) - lists all possible sale items and allows you to change recipes.
- Business Price Lists (for multi-venue licenses) - allows you to save and load cost and retail prices.
Other subjects include Master Products, Product Selection and Container Profiles.
Product Details
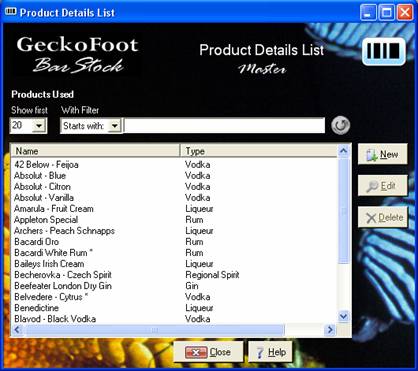
Local Product List
The local product
list is shown by clicking the ![]() button in the toolbar or selecting Product
Details from the settings menu and this shows all products currently used by your business:
button in the toolbar or selecting Product
Details from the settings menu and this shows all products currently used by your business:
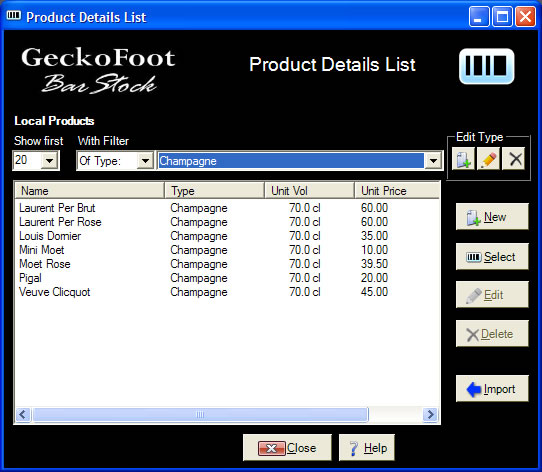
Product List
This shows the name, type, unit volume and unit price for local products.
You can show the first matching items or all items as required:
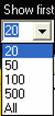
Show First Products
You may apply various filters use for searching the list of products.
You can filter out products based on Product Type, select the product type from the drop down list:
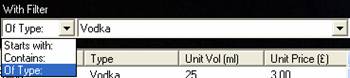
Filter Products on Type
Once you select a product type a type toolbar is shown:

Edit Type Tools
Click on New to create a new product group, edit to change the currently selected group or delete to remove the current product type.
You can also select what text the name should contain or start with:
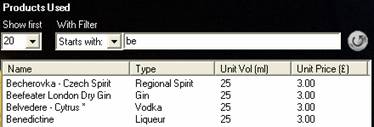
Filter Products which Start With
If you select the type
Click ![]() to add a new product.
to add a new product.
Click ![]() to edit an existing product’s detail.
to edit an existing product’s detail.
Click ![]() to delete a product.
to delete a product.
Master Products
The Master Product List can be shown by selecting the ![]() option from the Settings menu. These
products do not display a unit volume or prices as this is business specific
information.
option from the Settings menu. These
products do not display a unit volume or prices as this is business specific
information.
Master Product List
Product Profile
The product profile form is shown when clicking New or Edit from a product list or selection.
This allows you to view and edit details for the product:

Product Profile
All product profiles include the following attributes:
| Description | The name and basic description of the product. |
| ABV | Alcohol By Volume, this is half the Proof value. E.g. 80 Proof is 40% ABV. |
| Type | The product type grouping for this product.
Type Detail shows descriptive names and default sizes of units and standard
items. Select the correct type from the drop down list, click Edit to edit current type details or click New to add a new type. |
| Product Items | This list shows all different types of
containers for this product which have a unique barcode. Click New to add a new item, Edit to edit an existing one or Del to delete selected item. |
Local product profiles also include the following information and this information can be changed for individual businesses:
| Unit Volume | This is the size of units as they are
generally sold by the business. These are used calculate the number of units sold or wasted based on the change in stock levels. The default for this value is taken from the product type. |
Bar Price |
This is the price of a unit sold by the business. This is the price used to calculate expected takings based on the change in stock levels. |
Standard Item Volume |
This is the size of the product as it is purchased or used by the business and used for calculating cost for stocktaking purposes. |
Cost Price |
This is the cost price of the standard item used for calculating the cost of changing stock levels. |
| PLU Code | This is an optional identifier used for integrating with or comparing to EPOS system data. |
Click OK to apply any changes and close the form, click Cancel to close without applying changes.
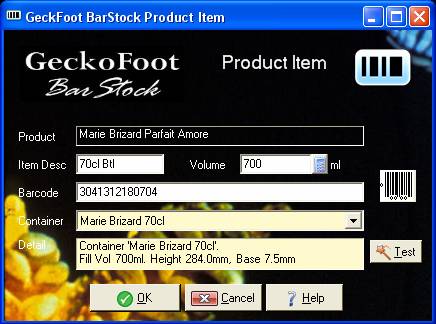
Product Item
A product item is a particular container for a product which has its own size, style and/or unique barcode.
For example: the same beer could come in 330ml bottles, boxes of 20 or gallon kegs.
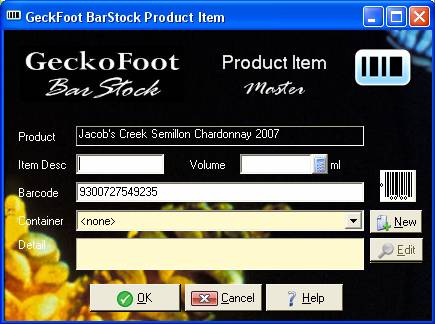
The product item view allows you to view and/or edit product item details:
Product Item
The Product Item form shows the product name and the following attributes:
| Item Desc | This is the short description of what type of item this is – e.g. 70cl Btl, 20 Case, Gallon Keg. |
| Volume | This is the full volume of this container. |
| Barcode | This is the Barcode of the item. This can be scanned in or manually entered. |
| Container (optional) | This is the container profile which is used by the system to calculate the content’s Volume based on the liquid height or container weight. The container detail shows some of the basic data. |
Clicking ![]() will show the Container Test form.
will show the Container Test form.
If available, for advanced users - clicking New will create a new container profile and Edit will edit the existing one:

Master Product Item
Click OK to apply and changes and close the window or Cancel to exit without saving.
Product Organiser
As different business and EPOS systems group their products differently, we have introduced a Product Organiser to help create and edit groups and move products around.
Select Product Organiser from the Settings menu or click the ![]() button on the toolbar to show the Product Organiser:
button on the toolbar to show the Product Organiser:
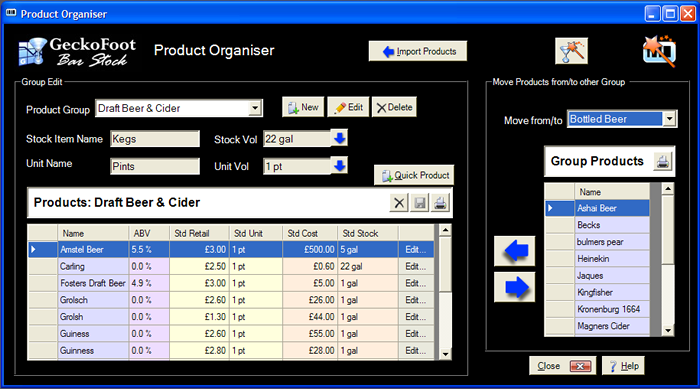
Product Organiser
Select the Product Group you are interested in and all the products in that group will be listed.
Click New to create a new group, Edit to rename or edit the Product Type or Delete to delete the currently selected group.
You can edit product details in the product grid and click the Save button - alternatively double-click a product to show its full Product Profile.
Click the ![]() buttons to update the default stock volume or the unit volume for all of the products in that group.
buttons to update the default stock volume or the unit volume for all of the products in that group.
Click "Quick Product" to create a new product.
Select a group to more products from or to and click the left and right arrow keys to move products between the groups.
Click Import Products to select a file which contains product information from your EPOS system and load the EPOS Import Wizard.
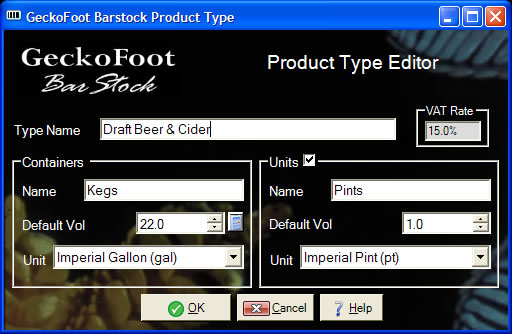
Product Type
The Product Type editor allows you to edit local or master type information:
Product Type
This includes:
| Type Name | The short description of the type. This appears on report headings. |
| Container Name | This is the name of the container in which the type of product is normally bought into the business. |
| Container Default Volume | This is the default volume of these containers. This can be overridden in the product profile. |
| Container Unit | Select the type of unit used to measure the size of the container. You can also select "Items" here if you want to count in whole items. |
| Units | These are enabled if the type of product is sold in amounts other than they are bought in. |
| Unit Name | This is the name used for the unit measure (e.g. Shots, Glasses or Pints). |
| Unit Default Volume | This is the default volume for this unit. This can be overridden in the product profile. |
| Sales Unit | Select the type of unit used to measure the size of the item sold. You can also select "Items" here if you want to count in whole items. |
Click OK to apply any changes (if permitted) and close the window, or Cancel to close without applying changes.
Product Selection
This form is used to browse product items from the master list and select items to be added to the local list used by the business. We recommend that you use the Bar Setup Wizard when doing a number of items.
The Product
Selection form will be shown when you click ![]() from the Configuration Menu or by selecting
from the Configuration Menu or by selecting ![]() from the Local Product List or Profile.
from the Local Product List or Profile.
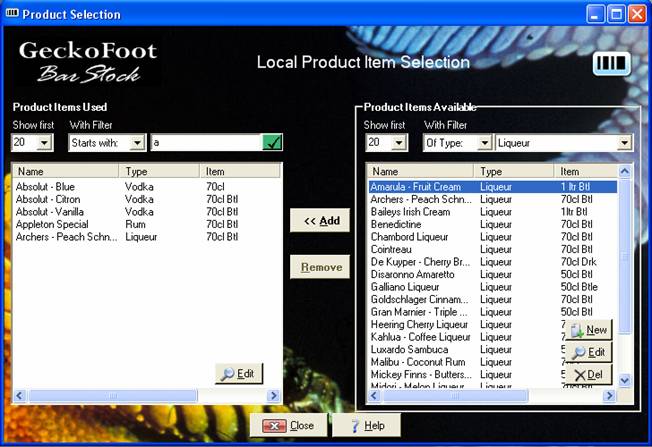
Product Selection
You can filter out products based on Product Type or by what characters the name should start with or contain as with Product Lists.
Select the item in the Available List and click Add to add the product item to the local list. All product, container and type information will also be added if it does not currently exist.
Clicking Remove will remove the Item from the Local list. Product, container and type information will be removed if it is no longer required.
Click Edit on the Product Items Used list to edit the local product profile.
On the Product Items Available list click New to create a new product, Edit to edit an existing product or Del to delete the selected product item
Container Test
Container Test form allows you to test the accuracy of the Scan & Measure system for the selected profile:
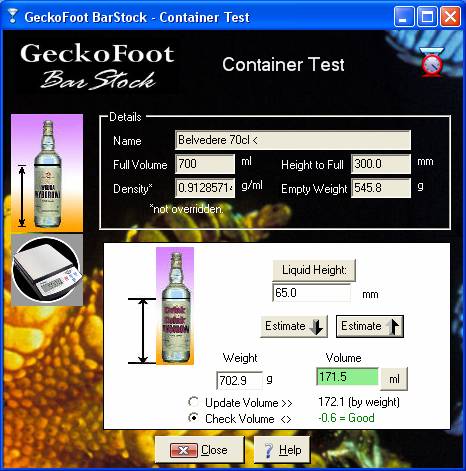
Container Test
Enter the
height of the liquid in the container and click ![]() to estimate the volume.
to estimate the volume.
Enter the
volume and click ![]() to estimate the height from the specified
Volume.
to estimate the height from the specified
Volume.
You can also enter the weight of the container and update the volume or check the Height to Volume estimate against the volume.
Click ![]() to toggle to
to toggle to ![]() .
.
Click Liquid Depth to toggle to Optic Depth:
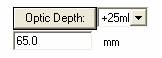
Optic Depth Test
Change optic size as required.
Container Profile
This allows advanced users to set up a container for Scan & Measure. This allows the system to convert the Weight of a container and contents or the Liquid Height or Depth in a container accurately into the volume of the liquid.
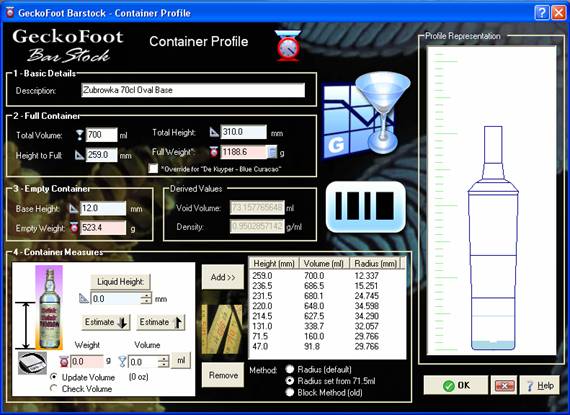
Container Profile
When profiling a container, start with a full untouched bottle and follow the following four steps.
Enter Basic Details
You will generally have one container profile for each shape of a bottle – different flavours of spirits often come in the same shape of bottle. Then when reusing that container for various flavours you can optionally override the full weight if the density of the product is different.
The first step is to name the container, include the product, size and description as required:
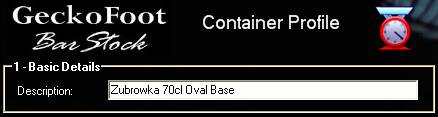
Container Description
Measure Full Container
The next step is to enter details about the container while it is full:
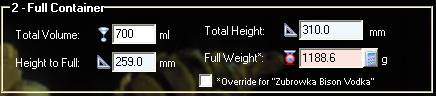
Full Container Description
Ensure you take the top off the container to measure full height and weight and enter the following details:
| Total Volume | This is the full volume of the Container. |
| Height to Full | This is the height from the worktop to the full point on the container. |
| Total Height | This is the height from the worktop to the lip of the container. |
| Full Weight | This is the weight of the container with the full contents. Please ensure the lid or bottle top has been removed. |
| "Override for xyz" | Click this check box and enter a new full weight if the container is shared between different products which use the same container and you wish to correct the full weight for this product only to handle different densities:
|
Empty Container
The next step is to empty the contents into a clean empty bottle. It is easier to use a free-pourer to ensure none of the contents are wasted.
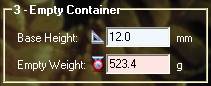
Empty Container
Enter the following details:
| Base Height | This is the height from the worktop to the bottom of the inside of container. This is the minimum level in the container which could contain liquid and is generally below the “Kick-up”, the raised portion of the base in a bottle. |
| Empty Weight | This is the weight of the container with no contents. Please ensure the lid or bottle top has been removed. |
Entering Container Measures
The next step is to enter container measures. Normally between 5 and 10 measures is generally the required number.
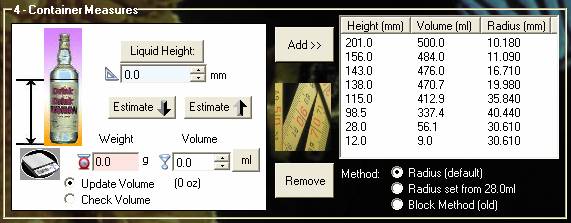
Container Measure
The first container measure should be just above the Kick-up base in a bottle if it has one - this is the curved part inside the base of the bottle.
The best method for entering container measures is as follows:
- Pour in required liquid – ensure bottle and scales are clean and dry
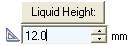
- Measure the Liquid Height from the worktop or scales to the top point of the liquid in the bottle
- Enter the height in the blue
box:
- Remove the ruler and weigh the container ensuring the scales are clean dry
- Enter the Weight in the red box
ensuring “Update Volume” is selected and the Volume will be updated:
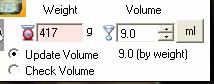
- Click Add to add the Container Measure to the list.
Continue to add measures concentrating on parts of the container where the shape changes.
Profile Representation
A representation of the profile is shown as it is being created:
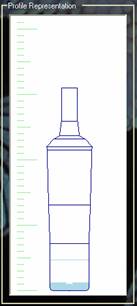
Container Profile
Note that this is a representation of the profile only and deviations from the actual apparent bottle shape are not significant to the accuracy especially around the bottle neck.
Choosing the Profile Method
The first thing to check is profiling method and the area of the bottle/container used to calculate the starting radius:
| Radius (default) |
The starting radius is calculated by assuming that the part of the bottle from the bottom reading to the second reading is almost a cylinder. Using this method it is important that these first two readings are as accurate as possible. If no part of the bottle is completely uniform (e.g. Galliano) ensure that the bottom two measurements are accurate and within about 1cm. |
| Radius set from xyz ml | If the bottle or container is not the most cylindrical (or uniform/boxlike) at the base of the bottle, then you can optionally initialize the width/radius from a different point on the bottle. Select the bottom point and click “Radius set from xyz” and it will initialise the bottle from that point. |
| Block Method | If the bottle or container has a very complicated shape you can revert to using more measurements and a block method which is generally less accurate. Please test thoroughly if you use this method. |
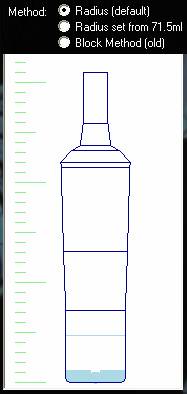
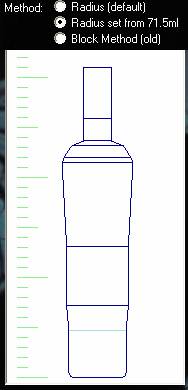
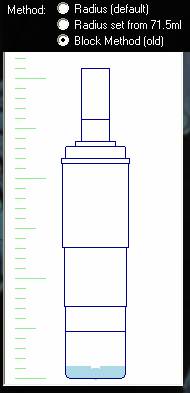
Container Profile Methods
Fine-tuning the Profile
Watch this space for hints and tips about fine tuning the profile.
Bar Setup Wizard
This section describes the Bar Setup Wizard used for setting up the system for your bar in the quickest way possible.
This can be performed by BarStock staff or once for a chain of venues – please contact Bar Stock for details.
As the BarStock product database grows - only minimal data entry should be required for most products, but initially and for unusual products data entry is required.
Launch Wizard
Click on ![]() to launch the Bar Setup Wizard or select Bar
Setup from the Configuration menu.
to launch the Bar Setup Wizard or select Bar
Setup from the Configuration menu.
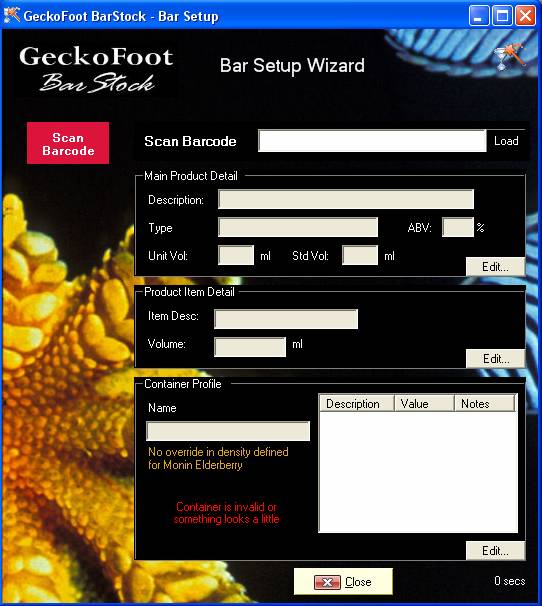
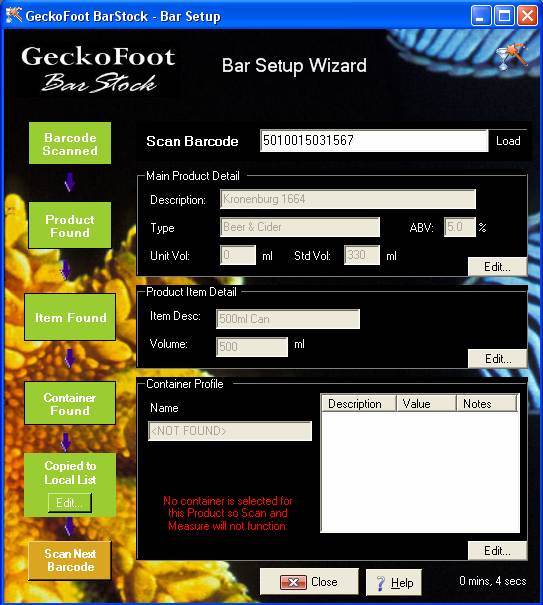
Figure 67 - Bar Setup Wizard
In order to configure the system you must scan each product in your bar.
The main stage of the wizard is shown on the left hand side of the window and each stage is described below.
Scan Barcode
If you have a barcode reader connected, scan the barcode.
Alternatively, enter the barcode manually and click Load.
![]()
Scan Barcode
If the product is recognised then it will ask you to Set Local Product information.
If the product is not found, the Wizard will ask you to Select Product, Select Item or Select Container.
Set Local Product Information
When a product is successfully found from the master list you can enter local product details.
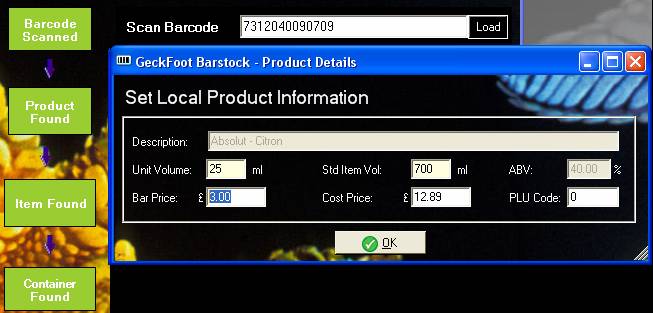
Product Details
This data includes:
| Bar Price | required | The price at which a unit of this product is sold. |
| Cost Price | required | The price at which a standard item is bought for costing purposes. |
| PLU Code | optional | A code used for integrating with or comparing against EPOS systems. |
| Unit Volume | default | The size of a unit if it has one. The default is taken from the Product Type - edit this to change the default for this type of product. Left zero indicates that the item is sold in the same containers it is bought in (e.g. bottled beer). |
|
Std Item Volume |
default | The size of a standard item as it is bought into the business for costing purposes. The default is taken from the Product Type - edit this to change the default for this type of product. |
This data can be changed through the product profile later as required.
Select Product
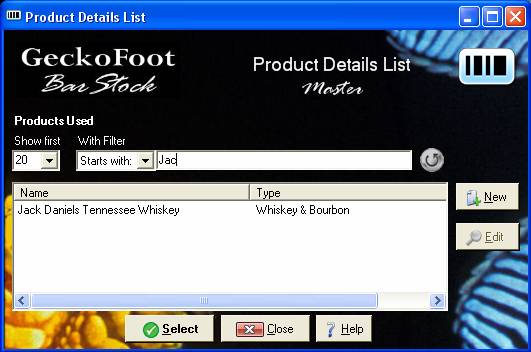
If the barcode is not recognised you will be asked to select the product:

Select Product
Click on the Select Product button and the Product Details List will be shown.
Locate the product if it exists, names generally start with the brand name so typing the brand name is a quick way to locate the product.
Select Product from List
If the product exists double-click or highlight the product and click Select.
If the product is not shown, click New to create a new product:
Enter the primary details for that product on the Product Profile form - i.e. name, ABV and type:
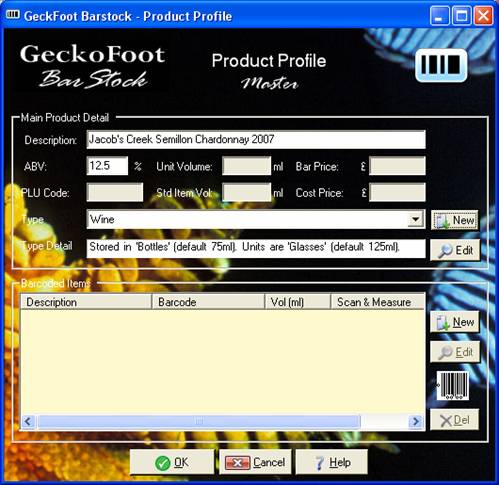
New Master Product
Click OK and then select the new product from the list:
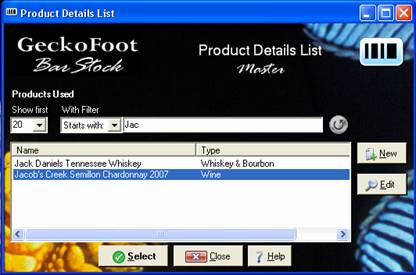
Select New Product
Define Item
Click on Define Item once product is selected:
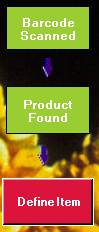
Define Item
This will show the Product Item view with the product and barcode already complete:
Product Item from Bar Setup
Complete the Item Description (e.g. 75cl Btl) and Volume (e.g. 750) and click OK.
All current details are shown on the Bar Setup Wizard form:
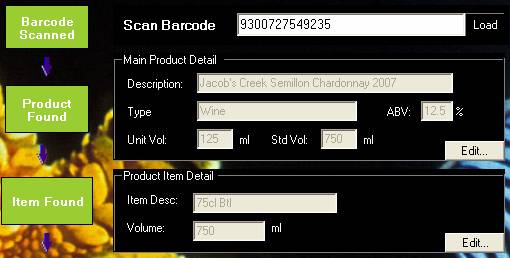
Figure 75 - Bar Setup Details
Select Container
Once the product and item have been found or selected, if the item does not currently have a container profile associated with it this will be highlighted.
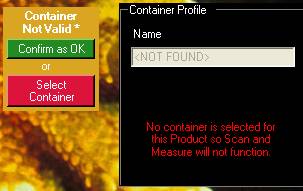
Container Profile not Found
If an item does not need to have scan and measure – i.e. products that are sold as whole items (e.g. bottled beer or some wines) – then click Confirm as OK, to add local details and finish with this product.
If the item requires Scan & Measure to operate then click Select Container to show the Item Detail form:
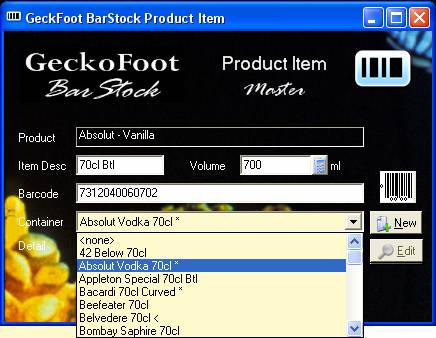
Select Container
Select an existing container or click New to create a new container profile. See the Container Profile section for more detail or send new products to GeckoFoot for us to do this process for you, or talk to us about configuring the software for your bar or chain.
Click OK to save changes when finished.
If there are any detected problems with the container profile, this will be shown and you can click Edit Container to edit the container to correct any issues.
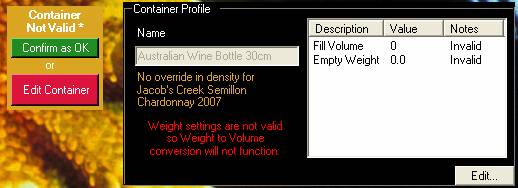
Container Issues
Density override is useful if the same containers are used for different products where the densities of the products are different. For Example: Each Monin, Bolls or De Kuyper liqueurs each come in the same style bottle for that brand but contain liquids of very different densities. This will affect weight to volume conversion. See the Measure Full Container section for more detail.
Final Check
Once you have entered local details you check or edit details or scan the next barcode as required.
Bar Setup, Final Check
Click on ![]() in the Copied to Local List to change any
local product information.
in the Copied to Local List to change any
local product information.
Or click ![]() on any of the profile sections to change the
master details and update the local copy as appropriate.
on any of the profile sections to change the
master details and update the local copy as appropriate.